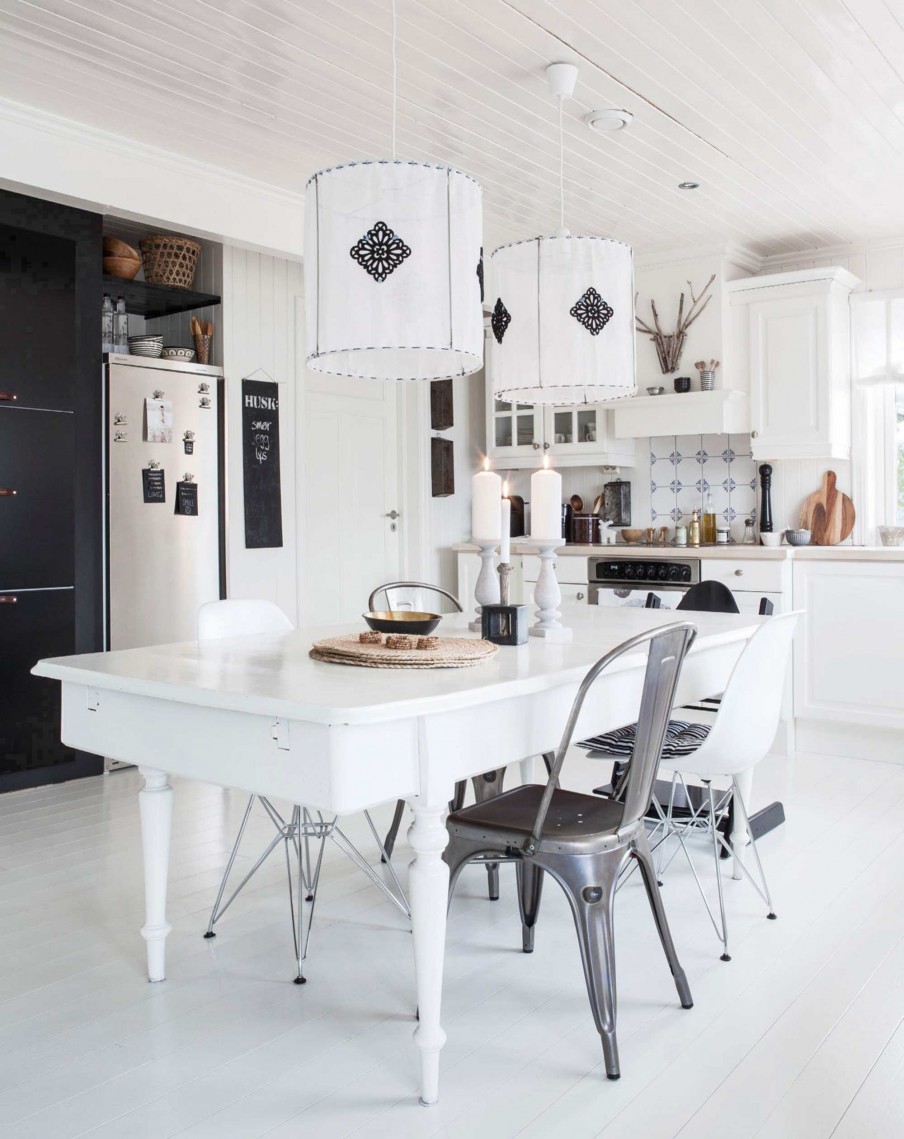
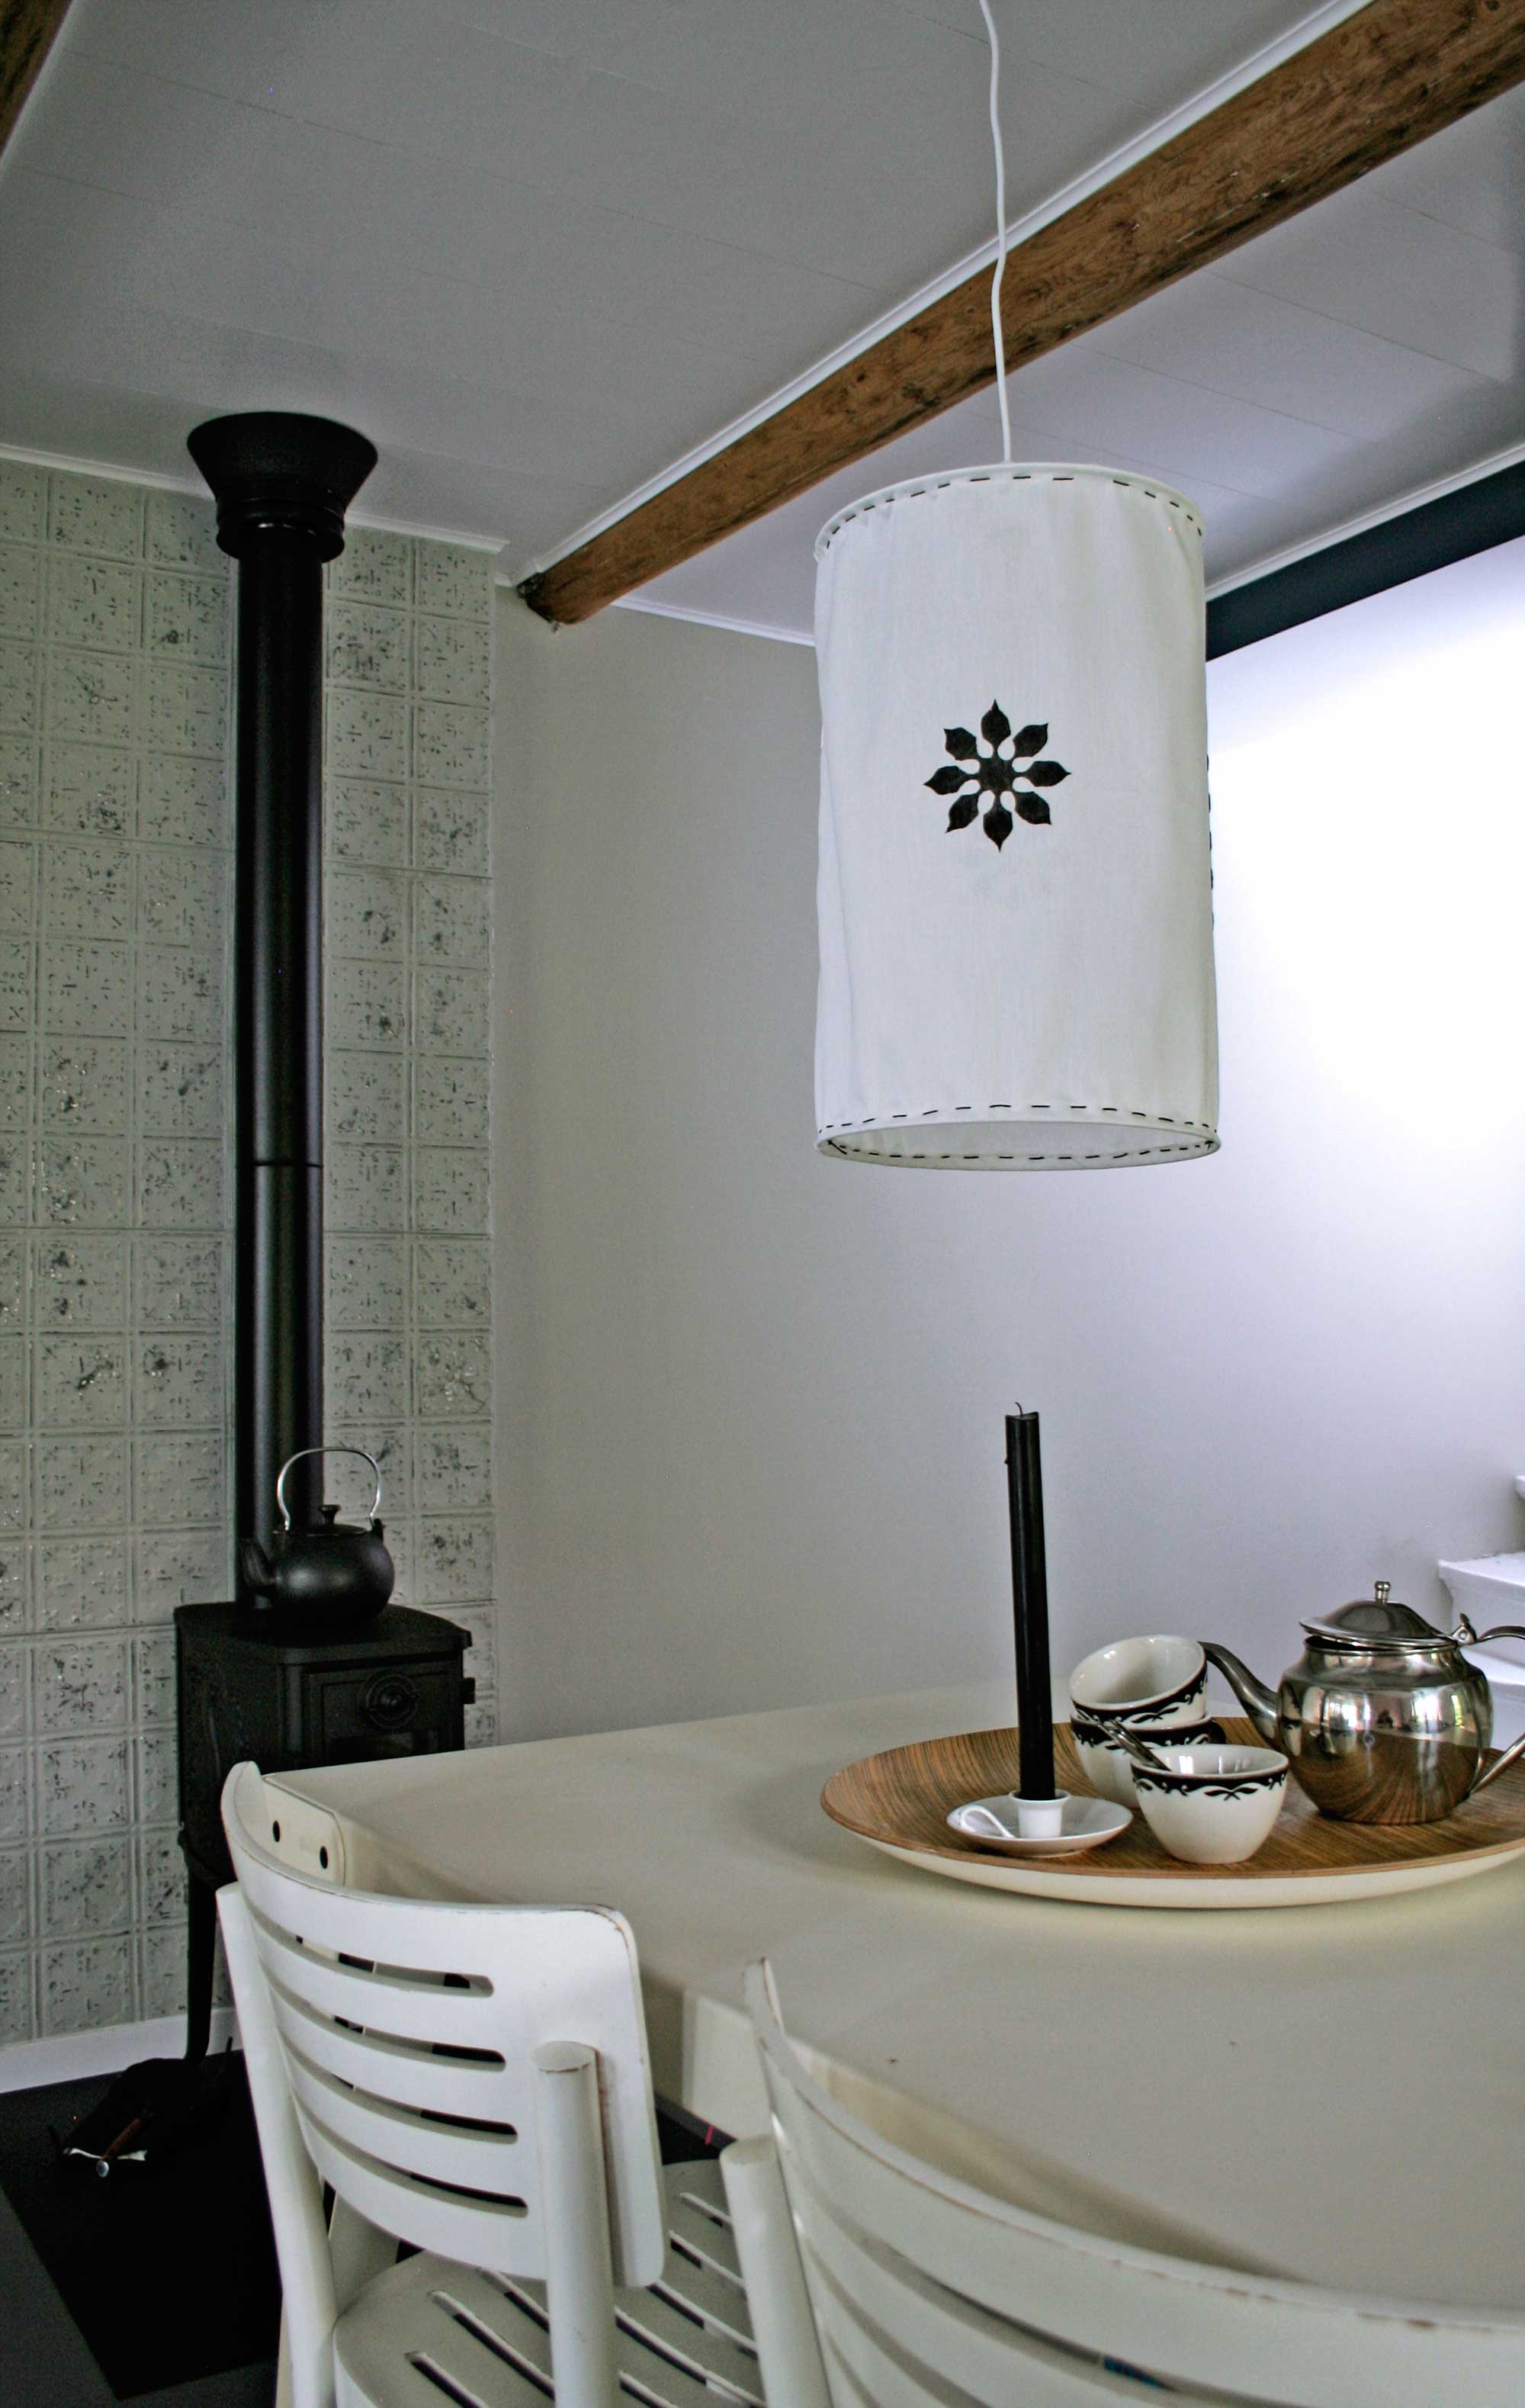
We haven’t had a DIY project in a long time on the blog but this one catched my eyes. Partly because of the beautiful decor, that got my attention in the first place and then by the question: where are those beautiful lamps from. And when I saw they were made and that the process seems quite simple it made my fingers all itchy.
Required
- semi-transparent fabric of ± 100 mm × 50 cm (for a diameter of 30 cm)
- black embroidery thread
- needle
- centimeter
- any sewing machine
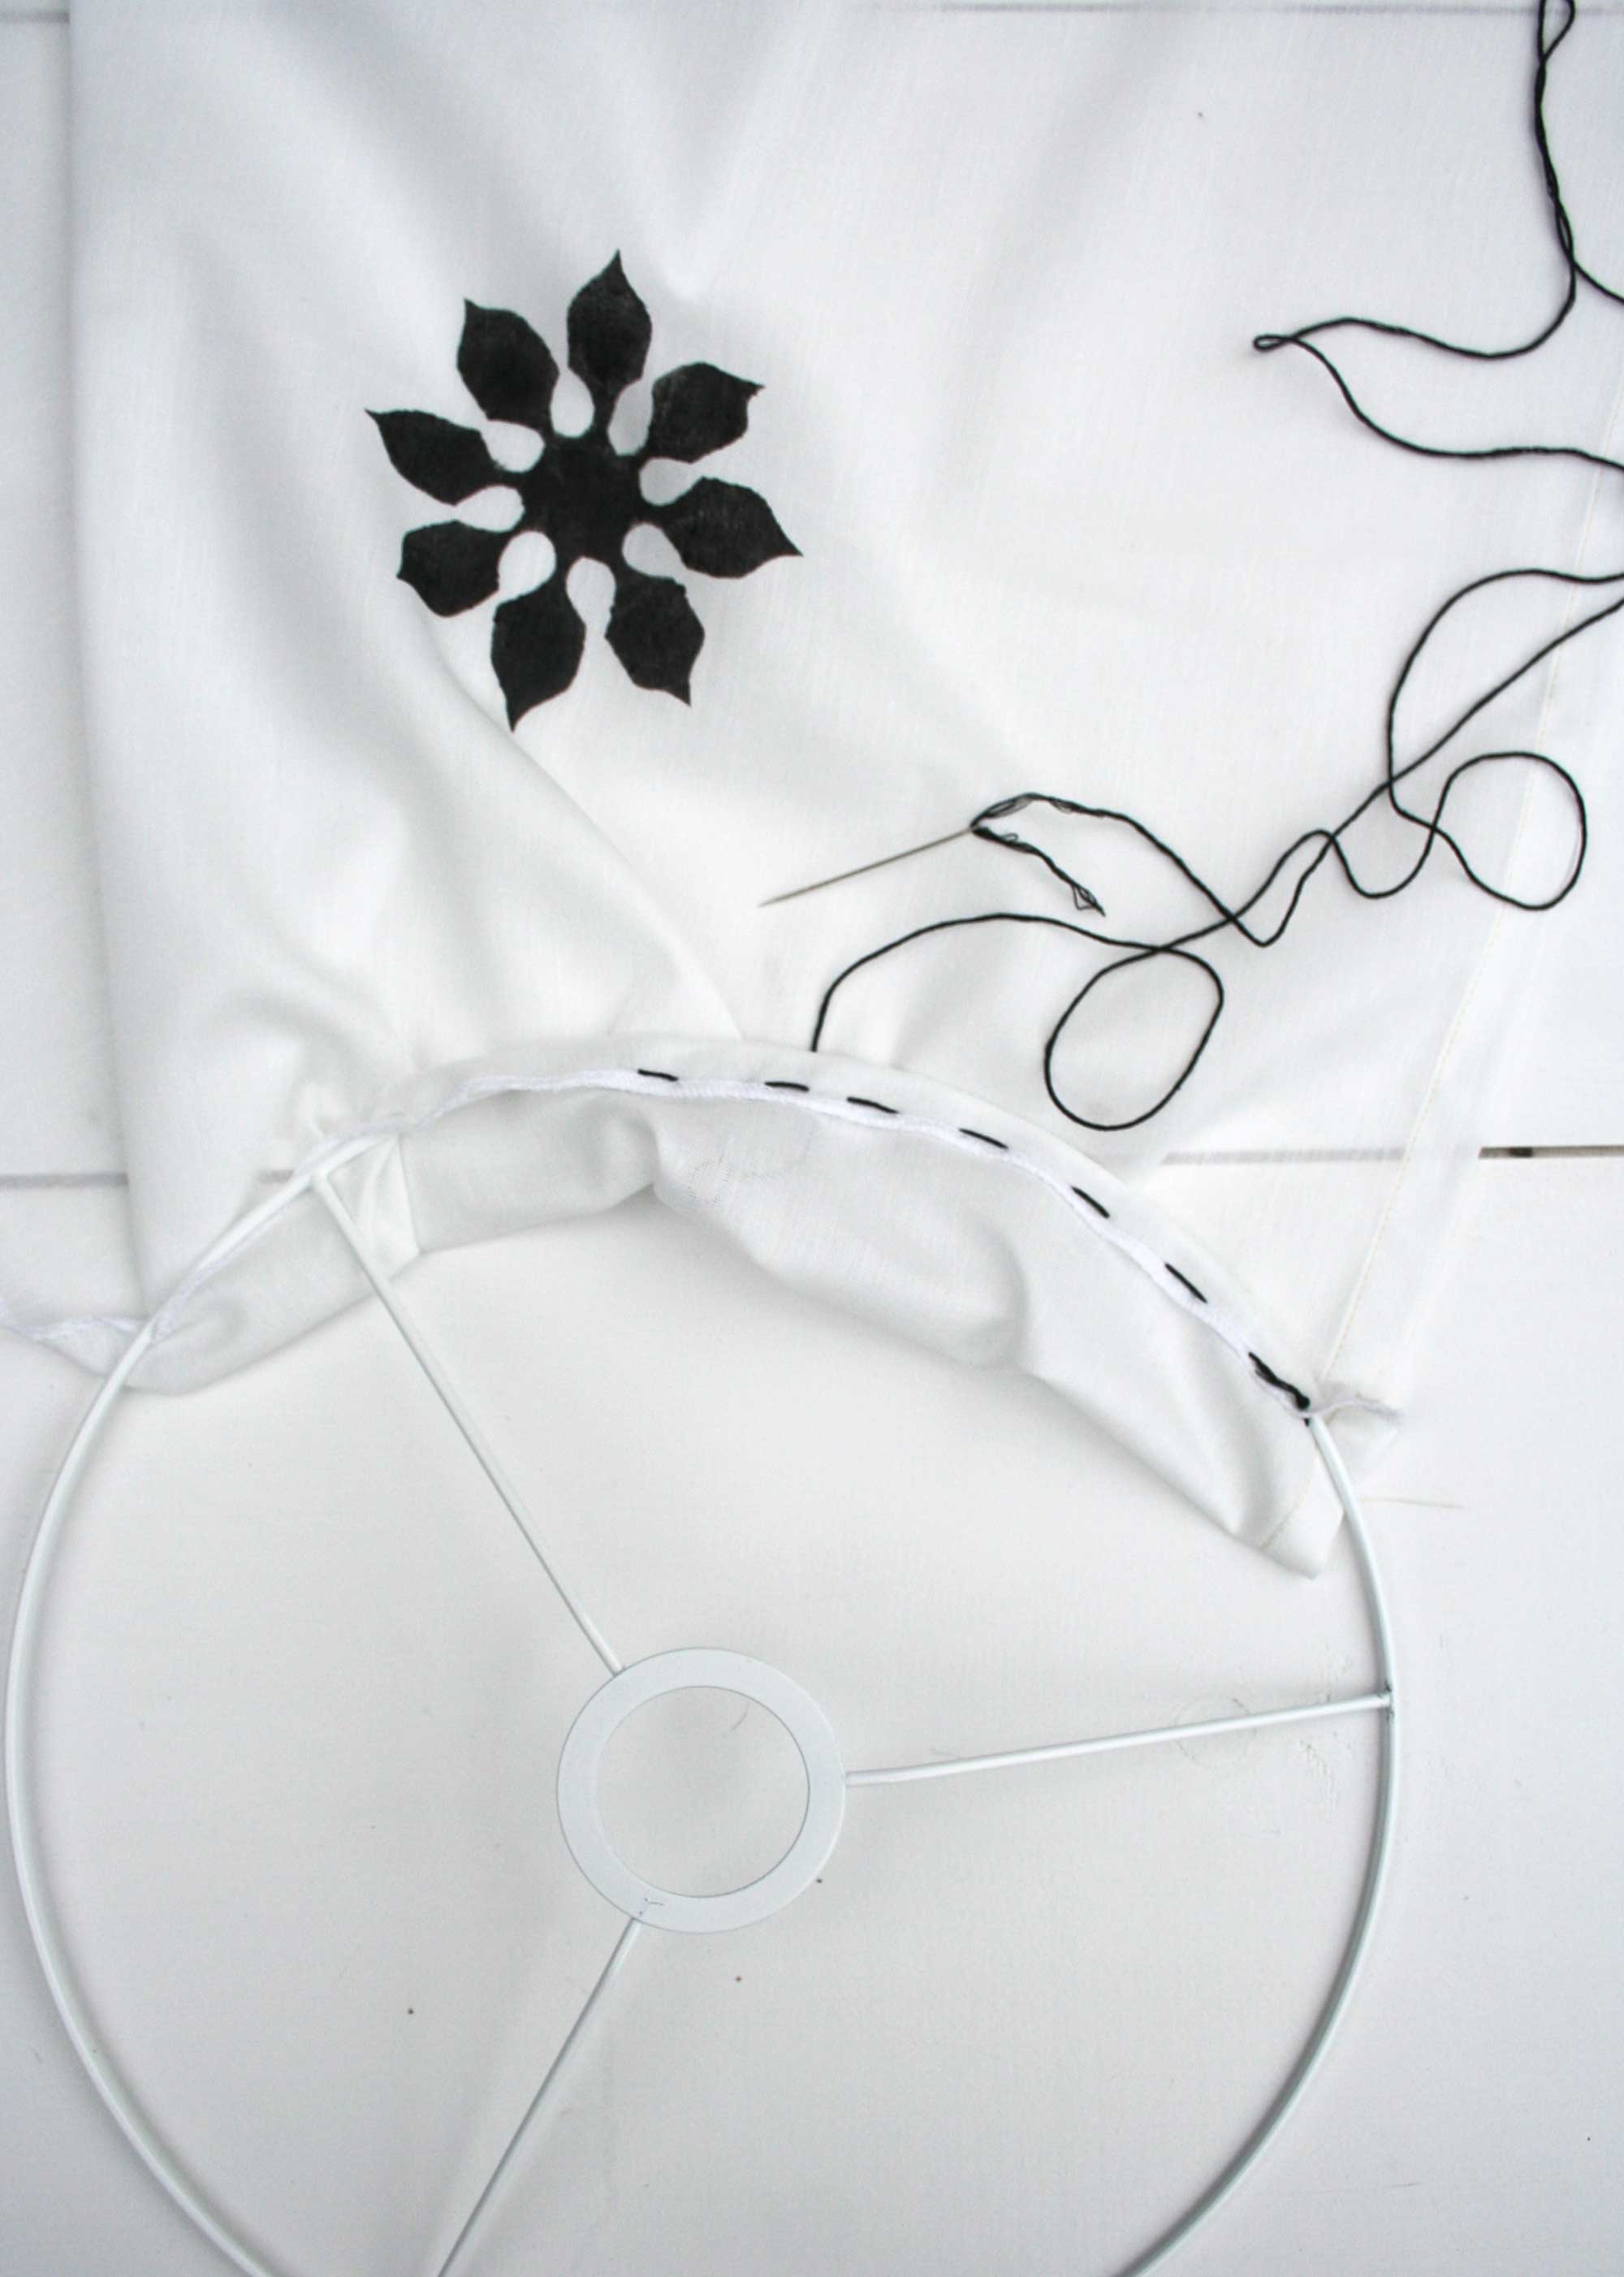
- 2x lamp rings (here 30 cm diameter)
- plastic sheet (sheet)
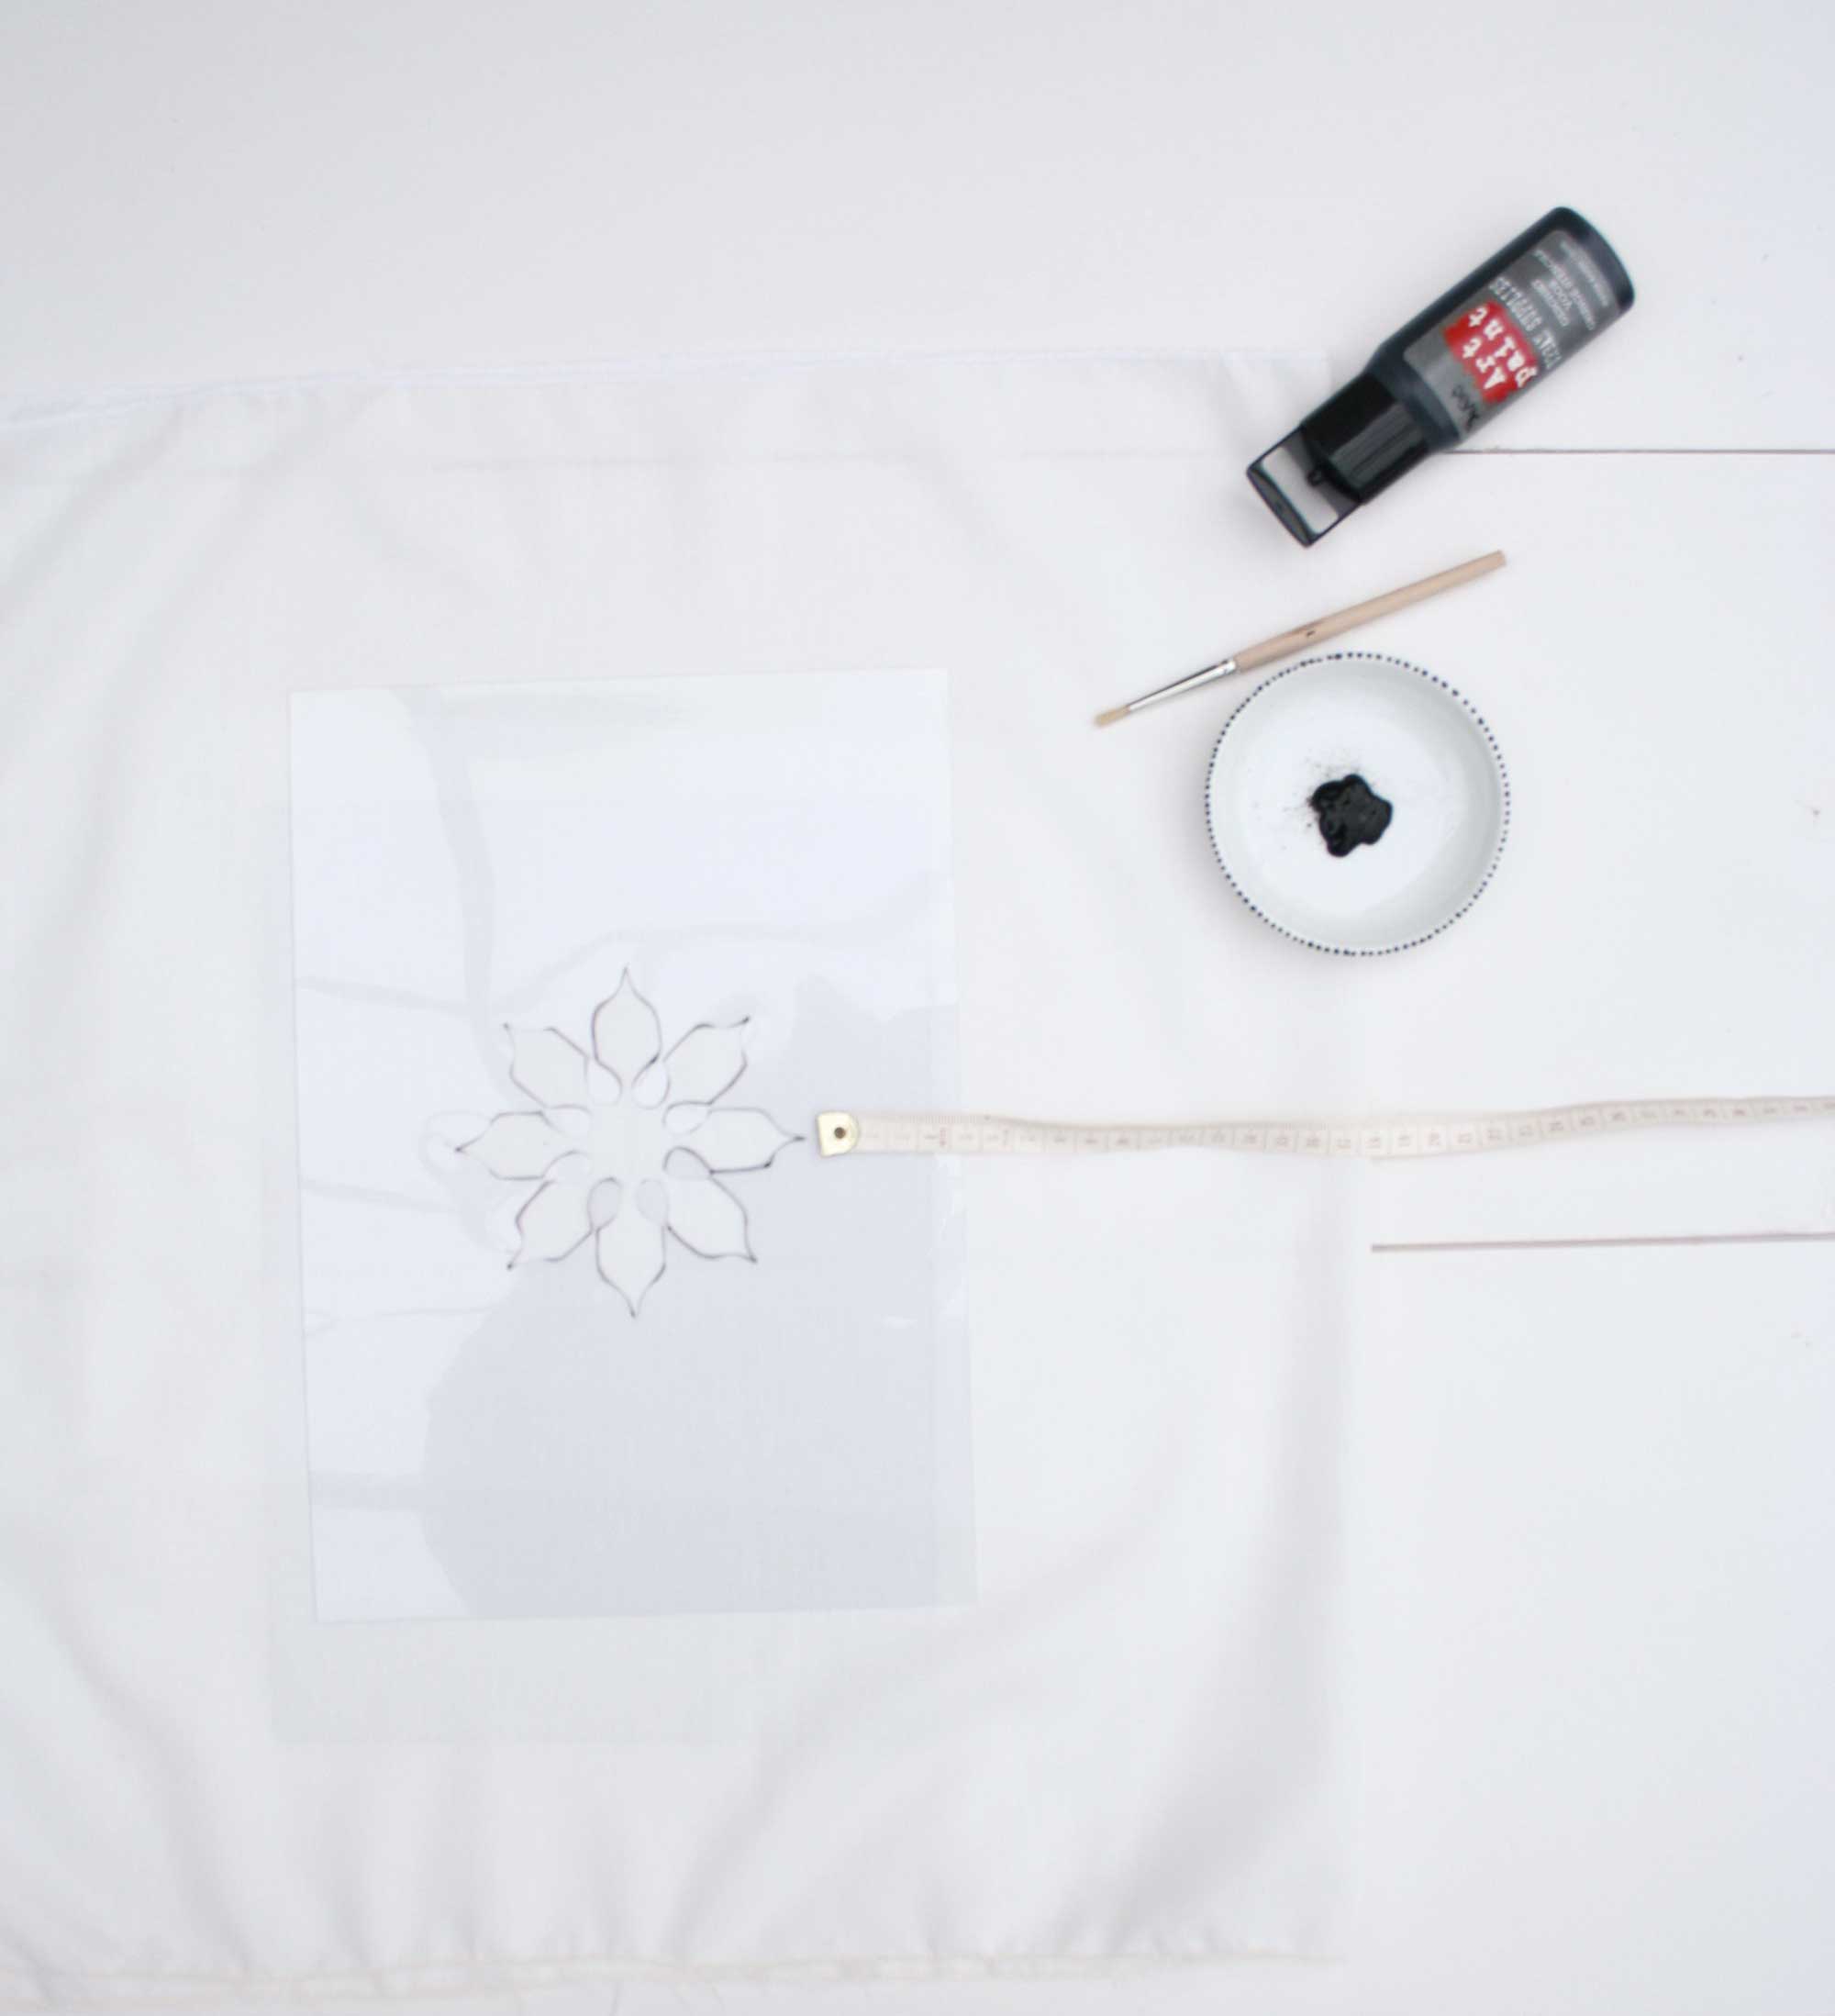
- black marker
- printed model for the ornamental painting (or you can design your own)
- black fabric paint
- small brush
- socket and cord
Instructions
step 1
Search the Internet for a beautiful design or make your own (I would go for a traditional Romanian motif). Note: Choose something that you can easily cut as a template: it should consist of a single drawing, that you can use a pattern.

step 2
Cut out the design from the sheet.
step 3
Cut the piece of fabric on the good dimensions. To find the perimeter, do the diameter x 3.14 cm. Make sure you cut the fabric around 5 cm longer. Work the long edges of the fabric with a small zigzag stitch so that it does not fray further. Stitch on the sides a rolled hem.
step 4
Determine where you want to place your design and how many drawings you want on the lampshade. If you choose to make 2 x design, it’s nice if they just come to lie opposite each other: fold the fabric in two and place the template exactly in the middle each time.
step 5
Paint inside the template. Make sure you don’t get paint under the edges of the template. Allow to dry.
step 6
Sew with the embroidery thread with a simple stitch along the top and bottom lamp ring. Make another decorative stitching from top to bottom. You can now cleanly eliminate the overlap of the seam. Attach the cord to the lamp ring.
Via Vtwonen
Keep up with Project Fairytale


